Social media is packed with Halloween ideas, but if you're anything like us, most of them feel way too out of reach. Sure, we'd love to be the parents who have the house fully decked out in Halloween decor and the costumes sorted since September, but let’s face it, we’re part of a last-minute mum club (and that’s totally okay).
If Halloween has snuck up on you ( yet again), and you're suddenly in panic mode over how to pull it all together, don't stress. These easy-to-follow Halloween face paint ideas don’t require an art degree, but they’ll still help you transform any costume with minimal effort.
What you will need for these Halloween face paint ideas.
 Amazon
The Snazaroo Face Paint Mini Starter Kit is perfect for doing Halloween face pant. This complete set offers vibrant, water-based colours that are easy to apply and remove. We love that it's made with non-toxic, skin-friendly ingredients.
 Amazon
You may want to add face-painting brushes to your collection for more detailed designs like the cobweb and skeleton face-paint ideas featured later in the article. These are great as they comply with the EU regulations.
 Bubble
www.boots.com
Halloween face paint is fun to put on, but it has to come off, too. If you've applied multiple layers, soap and warm water might not be enough. This gentle makeup remover is safe for all skin types, including young skin, and you can keep using it long after Halloween is over.
If you’ve already got your child’s Halloween costume sorted, but it's missing that spooky touch, a little Halloween face paint might be just what Dracula ordered! This is also an excellent option for kids who aren’t big on dressing up but still want to join in on the fun. A bit of face paint can go a long way in getting them into the Halloween spirit.
Or, if you're planning a cosy night in with some Halloween stories, face paint is a fun way to bring the characters to life. You can use bright colours and add extra details to make storytime even more magical (or frightful). Plus, most face paints have a shelf life of around 18 months, so chances are it'll still be good for next Halloween. And there's nothing we love more than a cost-effective costume.
We've found eight face paint looks for your child this Halloween, from scary witches and zombies to pretty fairies and simple skeletons.
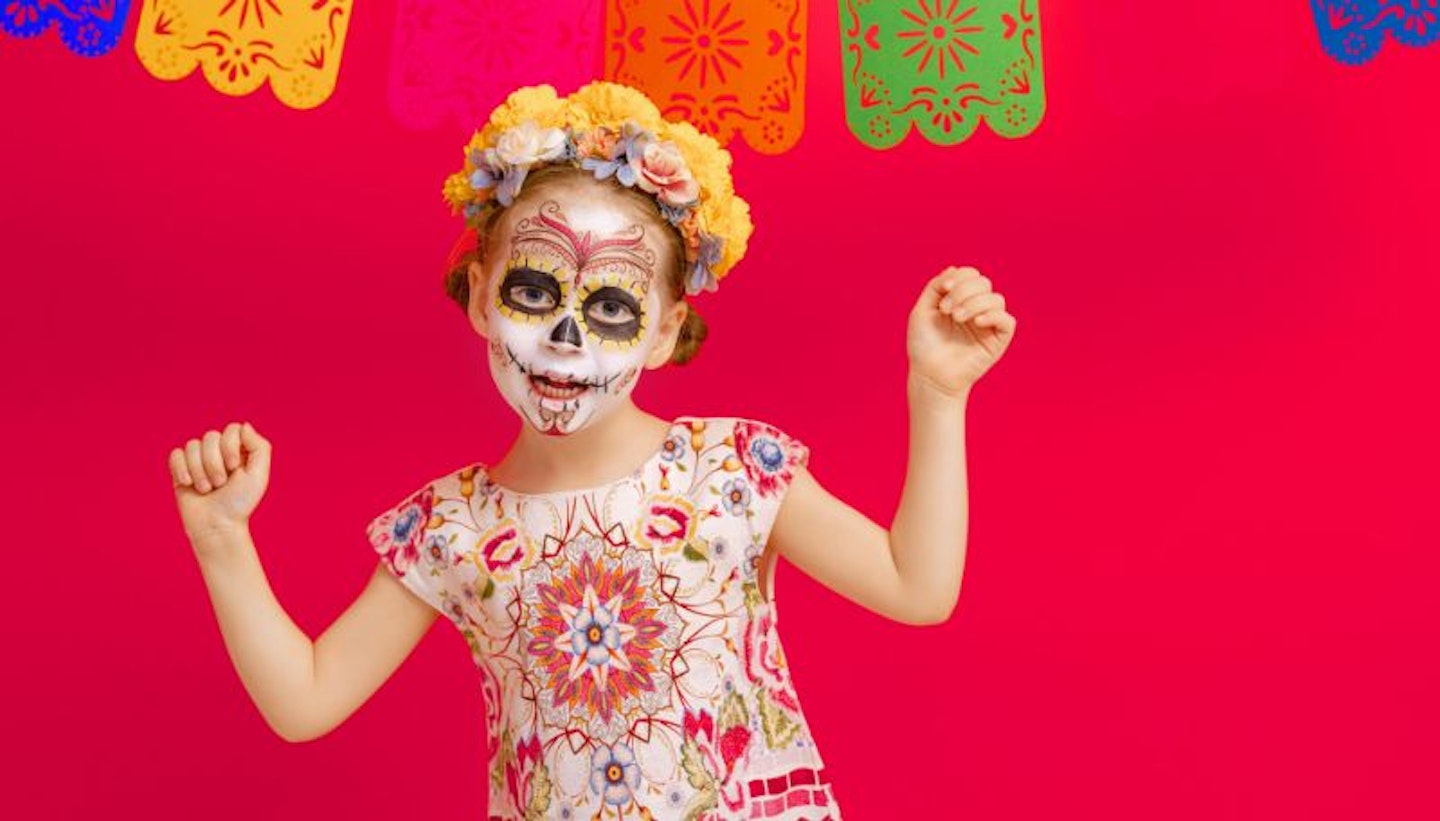
1. Simple skull Halloween face paint
Skulls are one of the most popular face paint ideas during Halloween, but they’re usually difficult to do. This one, however, is simple with minimal black detailing, yet it's still super effective.
What You'll Need:
• White face paint
• Black face paint or eyeliner
• Sponge or brush
• Thin detail brush
Steps:
Base Layer: Start by using a sponge or brush to apply white face paint all over the face, avoiding the eyes and mouth.
Hollow Eyes: With black face paint or eyeliner, draw large, oval or circular shapes around the eyes (as if creating sunken eye sockets). Fill them in completely with black.
Nose: Draw an upside-down heart or a triangle on the nose to represent the hollow nasal cavity, filling it in with black.
Cheekbones: Draw two curved lines starting from the outer corners of the mouth towards the ear to create hollow cheekbones. Shade underneath these lines with black paint to give depth.
Teeth: Draw vertical lines across the lips to create the illusion of teeth. Extend the lines slightly beyond the lips onto the cheeks for a full skeletal grin.
Final Touches: For more definition, add extra details like cracks or shadows on the forehead and around the face. You can also use flowers and more colours to create a Day of the Dead aesthetic on your skeleton face paint.
2. Tiger Halloween face paint
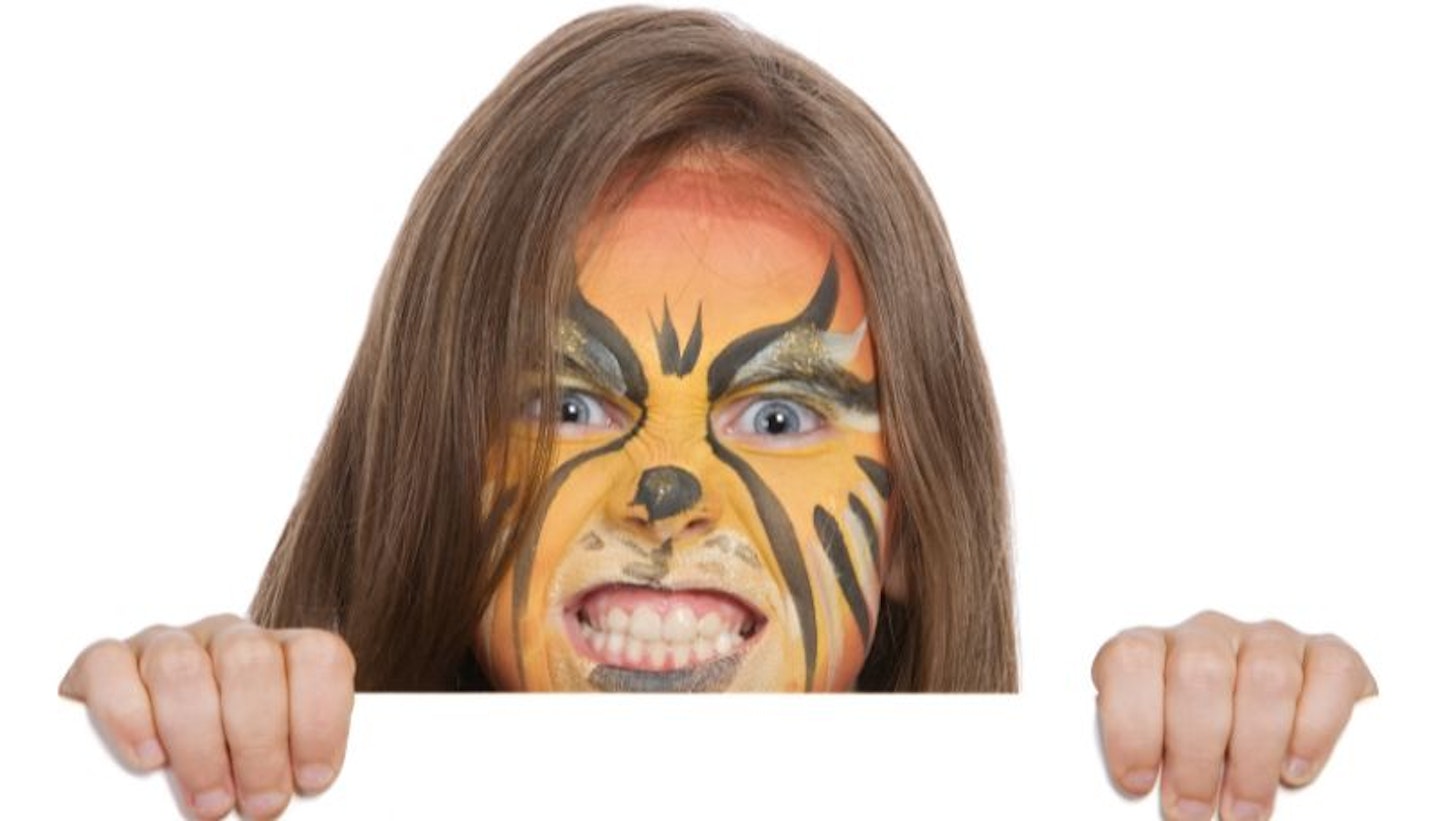
If your little one isn’t keen on being something scary for Halloween, then what about being a cute little tiger instead? This Halloween face paint idea is a lot easier to achieve than you think, and all you need is three colours and a bit of patience.
What You'll Need:
• Yellow or orange face paint
• Brown face paint
• Black face paint or eyeliner
• Sponge or brush
• Thin detail brush
Steps:
Base Layer: Start by using a sponge or brush to apply yellow or orange face paint over the entire face.
Nose: Use white or light brown face paint to create a rounded area on the lower half of the face for the lion’s muzzle. Draw an upside-down triangle on the nose with black face paint or eyeliner and fill it in.
Whiskers and Mouth: Draw three small dots on either side of the muzzle and add whisker lines coming from them. Then, extend a line from the bottom of the nose to the upper lip. Paint the upper lip black, leaving the bottom lip natural or lightly coloured.
Eyes: Use black face paint or eyeliner to outline the eyes, creating a bold, cat-like look. You can add small flicks at the outer corners to resemble feline eyes.
Ears and Details: Use brown paint to create small, curved shapes above the eyebrows to represent ears. Lightly dab brown paint around the face or add a fluffy headpiece to add extra details like a mane.
Final Touches: For more depth, use a darker shade of brown to outline areas like the sides of the nose and cheekbones, adding definition to your lion’s face.
3. Pumpkin Halloween face paint
Nothing says Halloween quite like a pumpkin! A pumpkin face paint design is our top pick for children who don't want to wear a costume but want to get involved in the Halloween excitement.
What You'll Need:
• Orange face paint
• Black face paint or eyeliner
• Green face paint (optional for the stem)
• Sponge or brush
• Thin detail brush
Steps:
Base Layer: Start by applying orange face paint all over the face using a sponge or brush. This creates the pumpkin's base. Then, make a cup of tea (or your beverage of choice) and let it dry for a few minutes.
Pumpkin Lines: Use black face paint or eyeliner to draw vertical lines from the top of the forehead to the chin, curving them slightly outward to create the look of pumpkin ridges. Space them out evenly across the face.
Eyes and Nose: Draw triangular shapes for the eyes and a small triangle for the nose, just like a classic jack-o'-lantern. Fill them in with black paint.
Mouth: Create a wide, jagged grin by drawing a large, curved line across the cheeks. Add vertical lines through the mouth to resemble carved pumpkin teeth.
Optional Green Stem: If you want to add a little extra detail, paint a small green stem on the forehead or at the hairline, adding leaves or vines for a fun twist.
Final Touches: Darken the black areas and touch up the orange base if needed for a sharp, bold look.
4. Vampire Halloween face paint
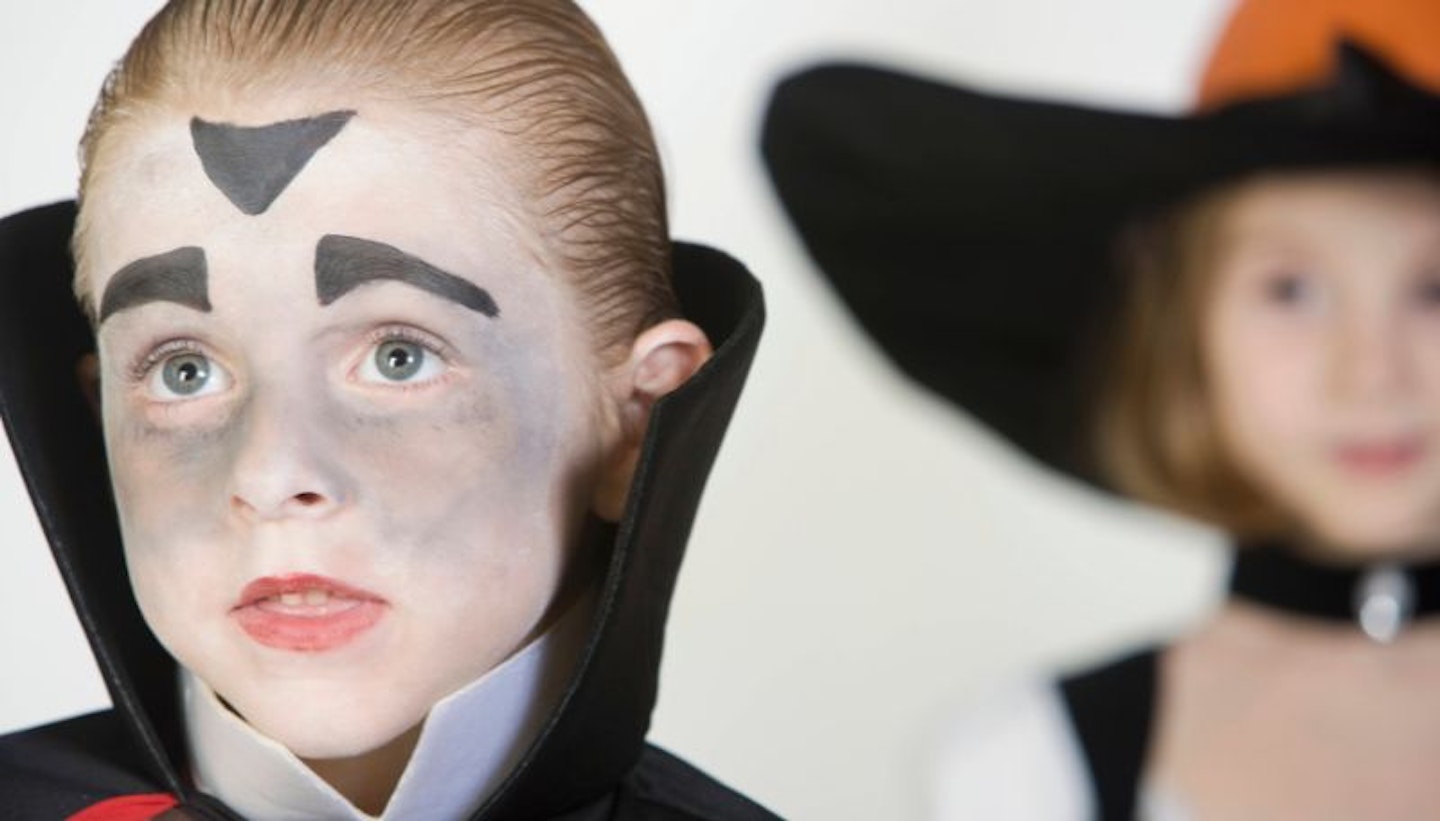
Are you tired because your little one seems to come alive at bedtime? Then you probably have your very own vampire. We love this spooky yet stylish vampire face paint look.
What You'll Need:
• White or light foundation face paint
• Black face paint or eyeliner
• Red face paint or lipstick
• Sponge or brush
• Thin detail brush
Steps:
Base Layer: Start by applying a white or very pale foundation across the face using a sponge or brush. You want this base to be as pale as possible to create the classic vampire look.
Dark Eyes: Using black face paint or eyeliner, create dark, dramatic circles around the eyes. Extend the paint slightly underneath and over the eyelids to give a sunken, undead look. You can also add a smoky effect by lightly blending the black with a sponge.
Eyebrows: Define the eyebrows using black paint or eyeliner. You can make them even more dramatic by extending them into sharp, angular shapes for an intense vampire glare.
Vampire Mouth: Outline the lips with black or dark red face paint. Fill in the lips with deep red or black for a perfect vampiric style. Then, using white face paint or eyeliner, draw two small fangs extending from the top lip.
Blood Drops: To complete the vampire look, add a couple of drops of "blood" dripping from the corners of the mouth using red face paint or lipstick. You can also add extra blood near the neck for more drama.
5. Cat Halloween face paint
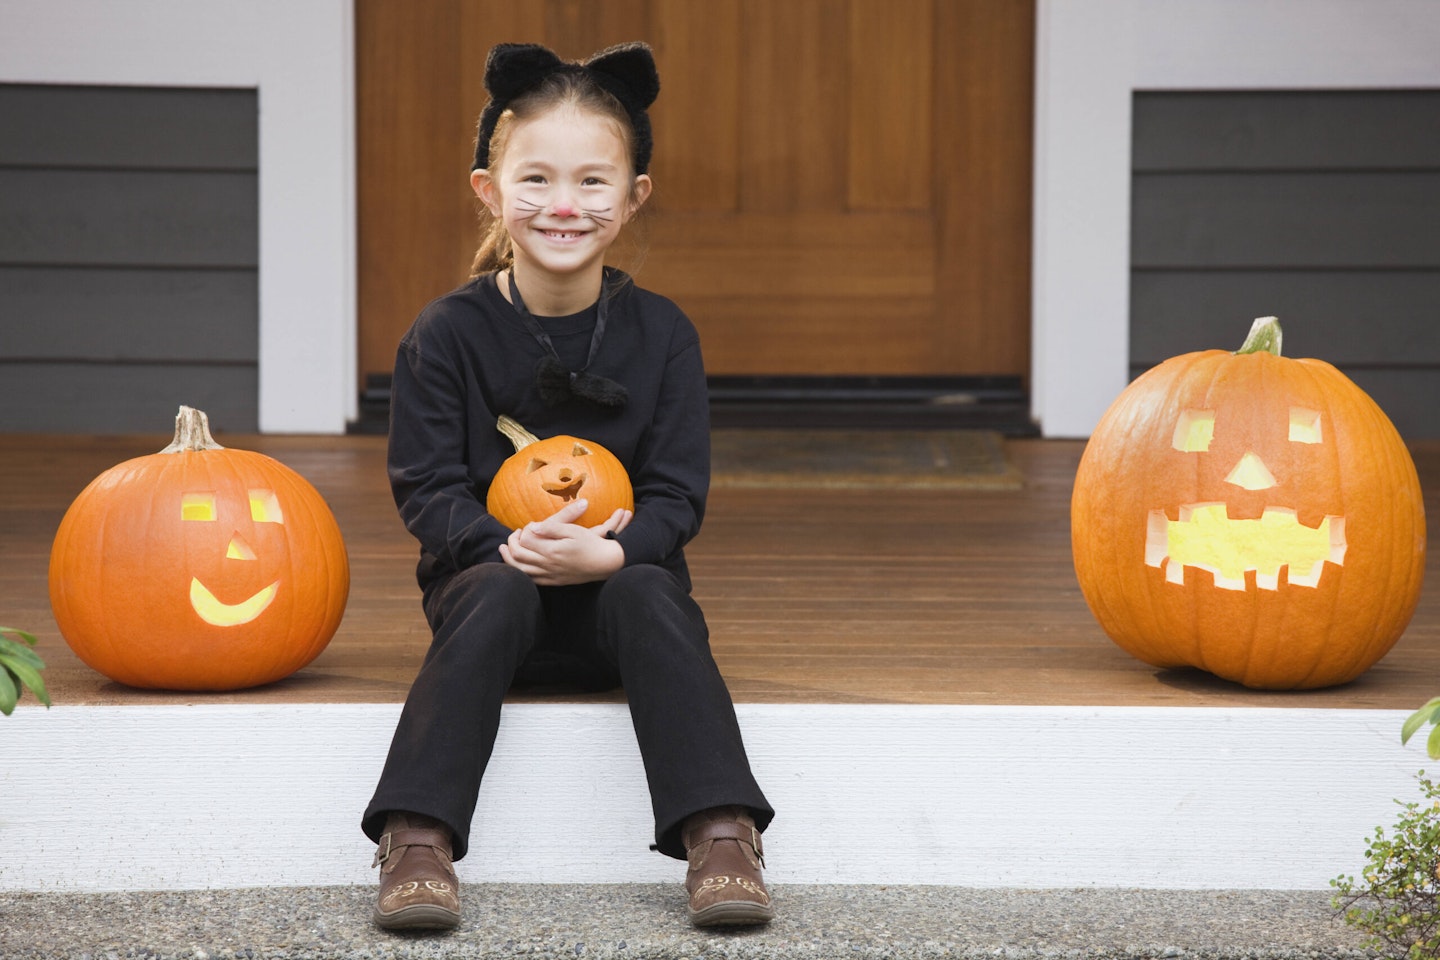
A cute little kitty-cat is always an easy go-to that works well for children and adults. There are plenty of cat Halloween face paint ideas you can do, too.
What You'll Need:
• White or light face paint
• Black face paint or eyeliner
• Pink face paint (optional for the nose)
• Sponge or brush
• Thin detail brush
Steps:
Base Layer: Start by applying white or light face paint over the entire face using a sponge or brush.
Nose: Use pink face paint to create a small triangle shape on the nose. You can also use black paint for a classic cat nose if you prefer.
Whiskers: With black face paint or eyeliner, draw three whisker lines extending from each side of the nose. Make them long and slightly curved for a more playful look.
Eyes: Use black face paint or eyeliner to outline the eyes, making them appear larger and more cat-like. You can fill in the eyelids with a light colour or leave them white for contrast. Consider adding a touch of yellow or green around the pupils for a striking effect.
Ears: Draw large triangular shapes above the eyebrows using black paint to create cat ears. You can fill them in or leave the insides white or pink to resemble the ear interior.
Mouth: Draw a small "V" shape beneath the nose to create the cat’s mouth. You can also add a line from the nose to the mouth for extra detail.
Final Touches: If desired, use black paint to add some light fur details around the cheeks and forehead for a more textured look.
{#h-6-pumpkin-halloween-face-paint}
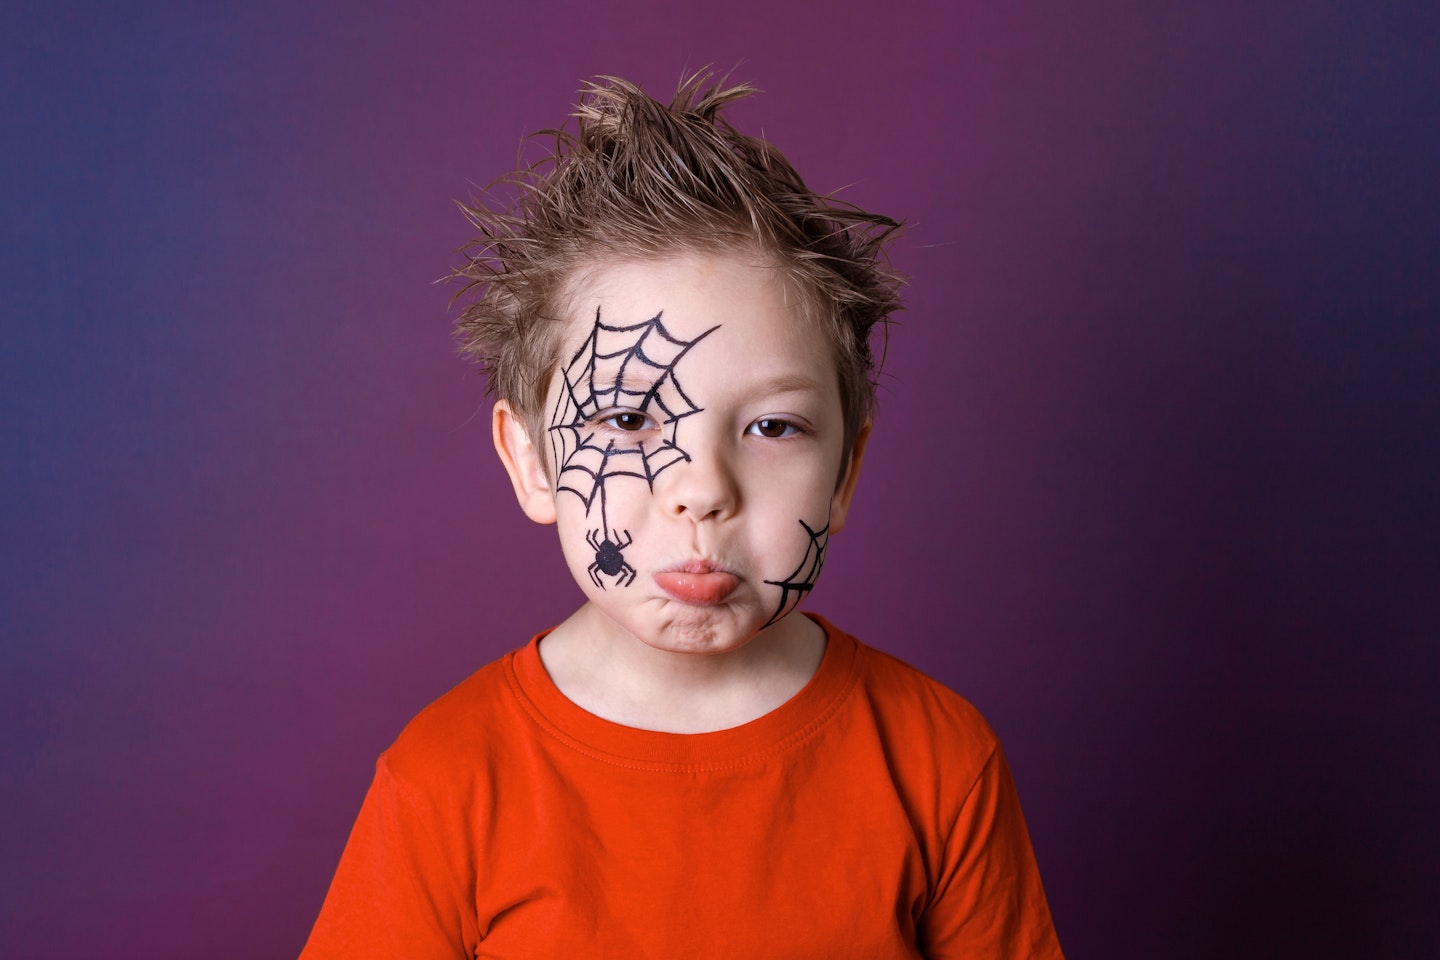
7. Cobweb Halloween face paint
Whether your little one is dressing up as Spiderman or a simple spider, this easy-to-achieve look is fantastic. We recommend using face paints, but you can also achieve this with a good black eyeliner.
What You'll Need:
Black face paint or eyeliner
Sponge or brush
Thin detail brush (optional)
Mirror (for precision)
Steps:
Base Layer: If desired, apply a base layer of foundation or skin-toned face paint to the areas around the web. This will help the black paint stand out. However, if you're using only black face paint, you can skip this step.
Draw the Center: Start by using the thin detail brush or the tip of the sponge to create a small circle in the centre of the forehead or cheek area. This will be the hub of your spider web.
Create the Web Lines: From the centre circle, draw lines extending outward in different directions. You can create about four to six lines radiating from the centre to represent the main web strands.
Add the Webbing: Connect the outer ends of these lines with curved lines, forming the classic spider web shape. Start with the first line you drew and make a curved line to the next, creating a triangular section. Repeat this for each segment of the web until you have a complete web pattern.
Detailing: If you're feeling really creative, you can also use the thin brush to add smaller, curved lines within the web to give it a more intricate look. This can help mimic the natural appearance of a spider web.
Final Touches: For an added spooky effect, you can create a small spider by drawing a circle at one end of the web and adding legs extending outward.
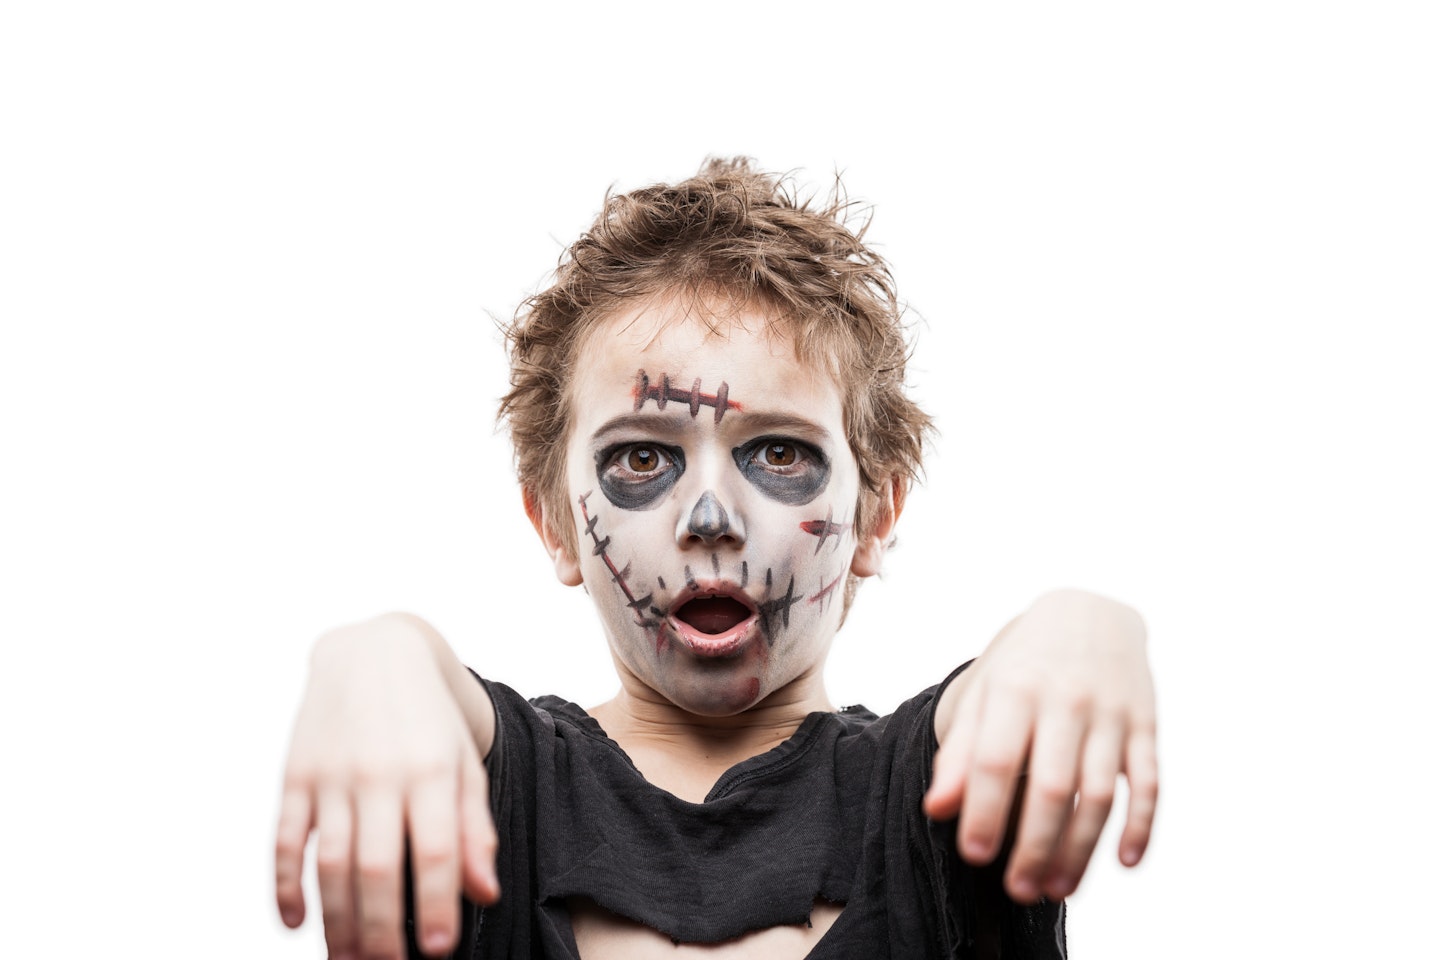
8. Zombie Halloween face paint
The zombie look requires minimal skills and can be achieved quickly, making it perfect for last-minute costume preparations.
What You'll Need:
White or pale foundation face paint
Grey or green face paint
Black face paint or eyeliner
Sponge or brush
Thin detail brush
Steps:
Base Layer: Start by applying a white or pale foundation across the entire face using a sponge or brush to create a sickly, undead base.
Zombie Colour: Use grey or green face paint to create shadows around the eyes, cheeks, and forehead. This adds depth and gives your zombie a more ghoulish appearance.
Dark Eyes: With black face paint or eyeliner, create dark circles around the eyes to enhance the sunken look of a zombie. You can also fill in the eyelids with black for added drama.
Mouth: Outline the mouth with black face paint or eyeliner, creating an exaggerated frown or jagged smile. You can add vertical lines to mimic decaying teeth or cracks in the skin.
{#h-10-sugar-skull-halloween-face-paint}
Frequently Asked Questions
When is Halloween?
Halloween is typically celebrated on October 31st every year, which this year falls on a Thursday, whilst most children are on half term. So, whether you're planning on Trick or Treating on Halloween night or having a party over the weekend, it's time to start prepping!
Is face paint safe for kids?
Yes, most face paints are safe for children if they are specifically formulated for skin use. Look for non-toxic, hypoallergenic products that are free of harsh chemicals. We recommend always doing a small patch test behind the ear and leaving it for 24 hours to check that they aren't going to have a reaction.
How to remove Halloween face paint
Face paint can usually be removed with soap and warm water. For stubborn paint, you may use baby oil or sensitive makeup remover. Again, always test a small area first to ensure there’s no irritation.
{#h-11-clown-halloween-face-paint}
Hannah Carroll is our Senior Digital Writer. In her capacity, she curates top-notch listicles, crafts insightful how-to guides, and delivers expert product reviews. As a mother of three, Hannah draws upon her comprehensive understanding of all facets of family life to bring true insight into all the products that make running a home easier.
